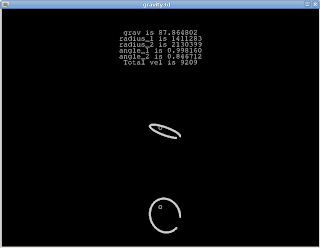
This is, therefore, the next logical extension to the previous post. Here I tackle the problem of establishing an orbit with coordinates in X, Y and Z axes. In a way, the three axes already exist to an extent even in the 2D version. It is quite important to realize that, as it makes the transition to 3D much easier if you are aware of it. How? In the 2D version, the coordinates of the body are mapped on the X and Y axes (across and down the screen), but the representation of the orbit rotates around the Z axis (perpendicular to the screen's surface, out of it).
The rotation axis for mapping the X and Y coordinates remains the same (around the Z axis), and the rotation axis for mapping the new Z coordinate becomes the "pseudo axis" (let's call it that) formed by the line from the origin (0, 0) to the body's X and Y coordinates. By those means, you only need to compute 2 angles to establish points in 3D. Those angles are azimuth and elevation. As we are not doing any "local" rotations of the body itself, these suffice.
A bit more on this here, for example; MathTeacher
Down to it, then. These are the new variables (excluding those we know should be there, by now; gravitational constant and mass).
double radius_1;
double radius_2;
double body_x = 1.5e6;
double body_y = 6.5e5;
double body_z = 7.5e5;
double b_vel_x = 0;
double b_vel_y = 3000;
double b_vel_z = 12000;
double grav_accel = 0;
double angle_1;
double angle_2;
// Here we do what we have done all along, except now they are known as angle_1 and radius_1
angle_1 = atan2f(body_x, body_y);
radius_1 = sqrtf(pow(body_x, 2) + pow(body_y, 2));
// We then use radius_1 with the body_z coordinate to obtain the elevation angle (ie; angle_2)
angle_2 = atan2f(body_z, radius_1);
// Now, obtain the total length of the bona fide 3D radius.
radius_2 = sqrtf(pow(body_x, 2) + pow(body_y, 2) + pow(body_z, 2));
// and the gravitation along the 3D radius.
grav_accel = (grav_const * (earth_mass / pow(radius_2, 2)));
// Now, the velocites produced by the gravity field...
// For the X and Y axes, they are "shortened" by the cosine of the elevation angle
// For the Z axis, it is simply the sine of the elevation angle
// Remember, the elevation angle was already taken from an axis (mostly) neither
// parallel to the X or Y axis.
b_vel_x = b_vel_x + ((sin(angle_1) * cos(angle_2)) * (grav_accel ));
b_vel_y = b_vel_y + ((cos(angle_1) * cos(angle_2)) * (grav_accel ));
b_vel_z = b_vel_z + (sin(angle_2) * (grav_accel ));
// And affect the respective velocities to the body coordinates.
body_x = body_x - (b_vel_x);
body_y = body_y - (b_vel_y);
body_z = body_z - (b_vel_z);

Fig 2:
A 3D elliptical orbit closing. Upper view is X, Y axes plan, lower view is X, Z axes plan.
A 3D elliptical orbit closing. Upper view is X, Y axes plan, lower view is X, Z axes plan.
No comments:
Post a Comment